Installing hardwood floors can be a challenging task, but with the right tools and a bit of knowledge, it can be a rewarding DIY project. Here are the steps you’ll need to take to install hardwood floors in your home.
Prepare the subfloor: Make sure the subfloor is clean, dry, and level. If necessary, use a self-leveling compound to level out any low spots.
Measure the room: Measure the length and width of the room to determine how much hardwood flooring you will need. Be sure to include an extra 10% to account for waste and any unexpected cuts.
Choose your hardwood flooring: Decide on the type of hardwood flooring you want to use. Consider factors such as color, grain, and durability.
Install a moisture barrier: If the subfloor is concrete, install a moisture barrier to protect the hardwood from moisture.
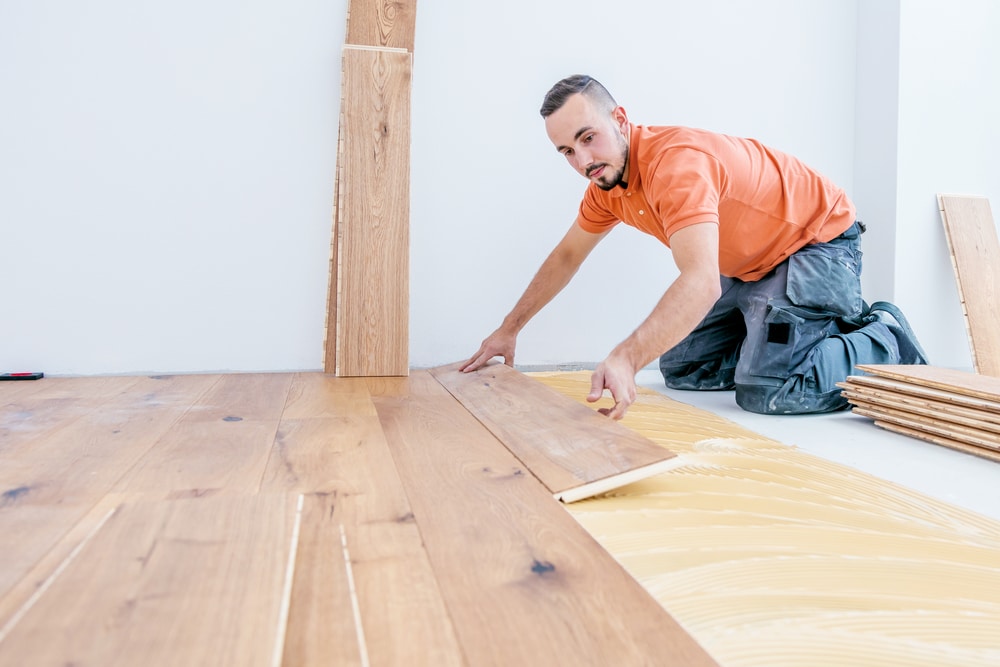
Lay out the hardwood: Begin by laying out the hardwood planks in the room to get an idea of how they will look.
Nail or Staple the hardwood: Start by nailing or stapling the hardwood planks to the subfloor, making sure to keep the edges of the planks tight together. Be sure to use a pneumatic flooring nailer or a pneumatic stapler.
Cut the planks: Use a saw to cut the planks to fit around door frames and other obstacles.
Install the trim: Install baseboards and quarter-round trim to cover the expansion gap around the perimeter of the room.
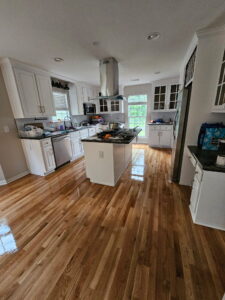
Finish the floor: Finish the floor with a coat of polyurethane to protect the hardwood and give it a glossy sheen.
Installing hardwood floors can be a time-consuming and challenging task, but with a little bit of patience and the right tools, you can have beautiful new hardwood floors in your home. It is important to be careful and take your time when trying to install hardwood floors. It is easy to cause damage to the wood if you are not careful. If all else fails, give Mr.Hardwood a call at 770-318-8880 for a free home estimate to restore the damaged area.